Not all water damage happens in an occupied home. In some cases, the worst situations are the ones no one sees for days, weeks or even months. Sometimes it can be when families are on vacation, and other times it’s because a home is sitting vacant for multiple reasons. In this blog, we discuss a situation of a vacant home after a death in the family, the damage it can cause and also insurance coverages in situations like this one.
The Situation
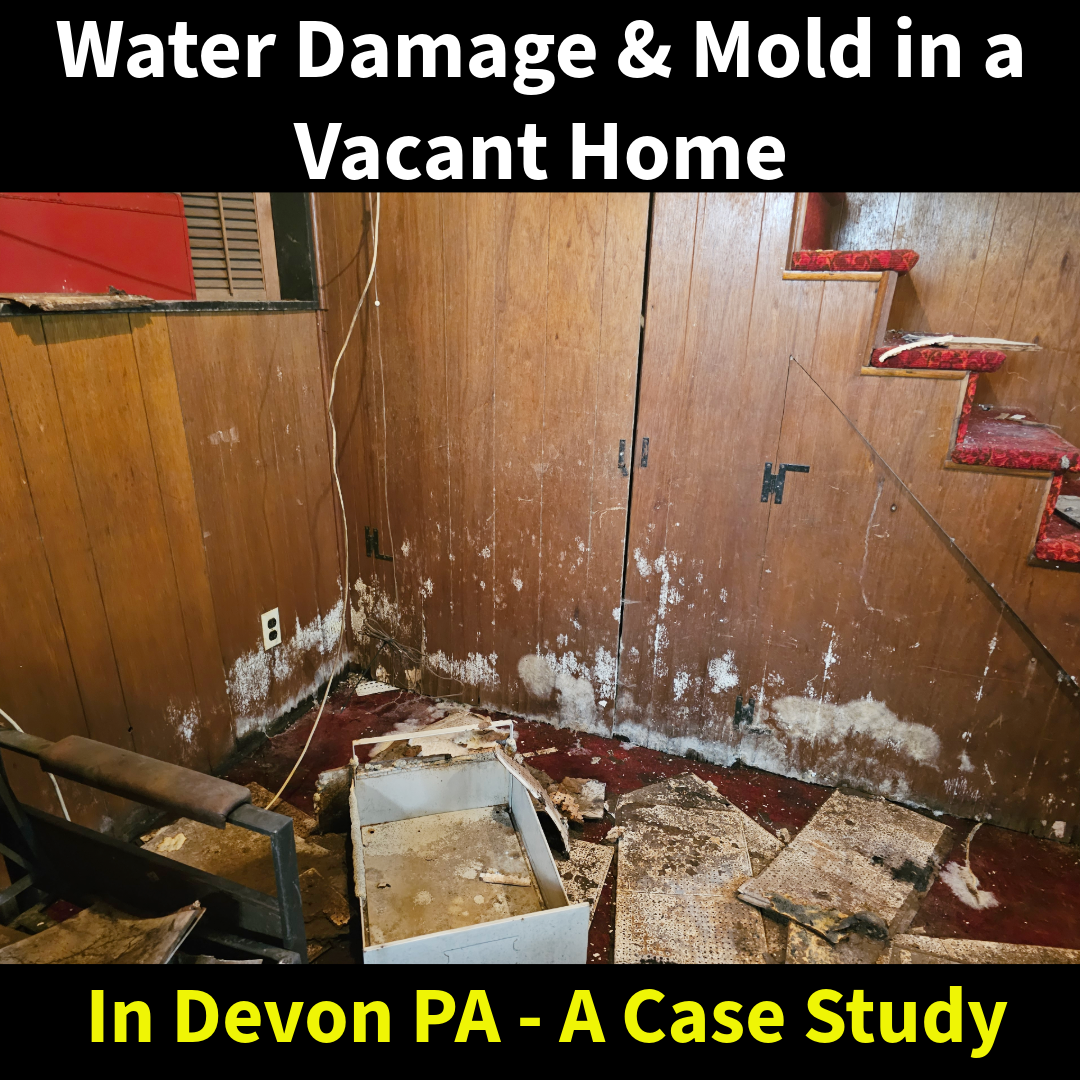
We were called out to a vacant home in Devon, PA. The home previously belonged to the caller’s mother, who had passed away about a year prior. Since then, the house had been sitting untouched. Like a lot of situations like this, the son just was not ready to go through everything or deal with the property right away. Eventually, he made the decision to go back and start handling the estate.
What he walked into was not what he expected.
What Was Found
By the time we arrived, the damage had already progressed well beyond a simple leak. When I first walked into the home, the smell hit immediately. There was a strong, heavy mold odor throughout the space. Not just in one room, but everywhere. The living room ceiling had completely collapsed and was sitting on the floor. The flooring underneath the carpet had absorbed so much moisture that it had begun to buckle and lift. It was raised enough in areas that you could easily trip over it just walking through the room. This was not recent damage.
This had been sitting for some time.
Multiple Points of Failure
What made this situation worse was that it was not just one issue. There was a leak from a bathroom that had allowed water to travel down into the living room and continue into the basement below. That alone would have been a significant loss. But at the same time, the back bedroom had a roof leak that had caused its own separate damage to ceilings, walls, and flooring in that part of the house.
So now you have:
- Water coming from above in one area
- Water traveling downward into lower levels
- A completely separate leak affecting another part of the home
All in a property that had been sitting vacant. No one there to catch it early. No one there to stop it.
How Far the Damage Spread
By the time everything was uncovered, the damage extended through multiple levels of the home.
In the living room:
- The ceiling had to be removed
- Carpet and flooring were saturated and buckled
- Walls had absorbed moisture and required removal
In the back bedroom:
- Ceiling materials were compromised
- Wall cavities had been affected
- Flooring had to be removed due to water exposure
And then there was the basement.
The Basement Condition
The basement is where everything collected. Water had made its way down and sat for an extended period of time. This created the perfect environment for mold growth.
We found:
- Mold growth on joists
- Contamination along foundation walls
- Affected flooring materials throughout
This was not a light cleaning. The basement required a full gut, followed by detailed cleaning and sealing from top to bottom.
There was no shortcut here.
Contents Loss
One of the more difficult parts of this situation was the amount of personal property that was affected. Because the home had been left untouched, it still contained the belongings of the homeowner. With the combination of water damage and mold growth, a significant amount of those contents were no longer salvageable. This is where these situations go beyond just structural damage.
It becomes personal.
The Insurance Issue
Insurance was involved, but the claim was denied.
There were two main reasons for this:
- The property had not been reported as vacant
- The damage was considered long-term and not sudden
This is something a lot of people do not realize. Standard homeowner policies are written for occupied homes. When a property becomes vacant, the risk profile changes significantly. Without proper notification or a vacancy endorsement, coverage can be limited or denied altogether. On top of that, insurance is generally designed to cover sudden and accidental damage, not issues that develop over time without intervention.
In this case, both factors came into play.
The Deeper Impact
Beyond the physical damage, this situation hit on a different level. The homeowner was already dealing with the loss of his mother. Coming back to the property and finding it in this condition only added another layer of stress.
Now instead of just handling the estate, he was dealing with:
- Structural damage
- Mold remediation
- Content loss
- Out-of-pocket repair costs
It turned what should have been a process of closure into something much more difficult.
What We Had to Do
The scope of work was not small. This required the removal of collapsed and damaged ceiling materials, along with flooring and carpeting throughout the affected areas. Sections of walls had to be opened and removed where moisture had traveled. The basement required a full gut, followed by mold remediation on the structural components. From there, all affected surfaces were thoroughly cleaned and sealed.
Every step had to be documented properly and handled in sequence to ensure the structure could be brought back to a safe condition.
What Most People Don’t Realize About Vacant Homes
Situations like this are more common than people think. When a home is vacant, small leaks often go unnoticed. Moisture sits longer than it should, allowing damage to compound over time. In many cases, multiple issues can develop at once without anyone realizing it.
What might have been a minor repair if caught early can quickly turn into a full-scale loss.
The Importance of Checking on Vacant Properties
Even if a home is not being lived in, it still needs to be checked regularly. That means physically walking through the property, checking for any signs of leaks, and paying close attention to areas like bathrooms, roofs, and basements. Catching problems early is what prevents them from spreading.
Something as simple as a routine visit can make the difference between a small repair and a major loss.
Understanding Vacancy and Insurance
If a home is going to sit vacant, it is critical to notify your insurance company. There are policies and endorsements specifically designed for vacant properties, and without them, coverage can be limited or denied. In many cases, homeowners may end up being responsible for the full cost of repairs.
This is not something that should be assumed to be covered. It needs to be addressed upfront.
What to Remember
This situation did not happen overnight. It developed over time in a home that no one was actively checking. What started as a bathroom leak and a roof issue turned into structural damage, mold contamination, content loss, and ultimately a denied insurance claim. All of this occurred in a property that once held a lifetime of memories. Vacant homes still require attention, even when no one is living in them. Regularly checking on the property and making sure it is properly insured can prevent situations like this from happening.
We thank the home owner, who asked to be anonymous, but wanted his story shared to inform others of the dangers of leaving properties unchecked for long periods of time.