Most people think water damage is about how much water came in. It’s not. It’s about how long it sits.
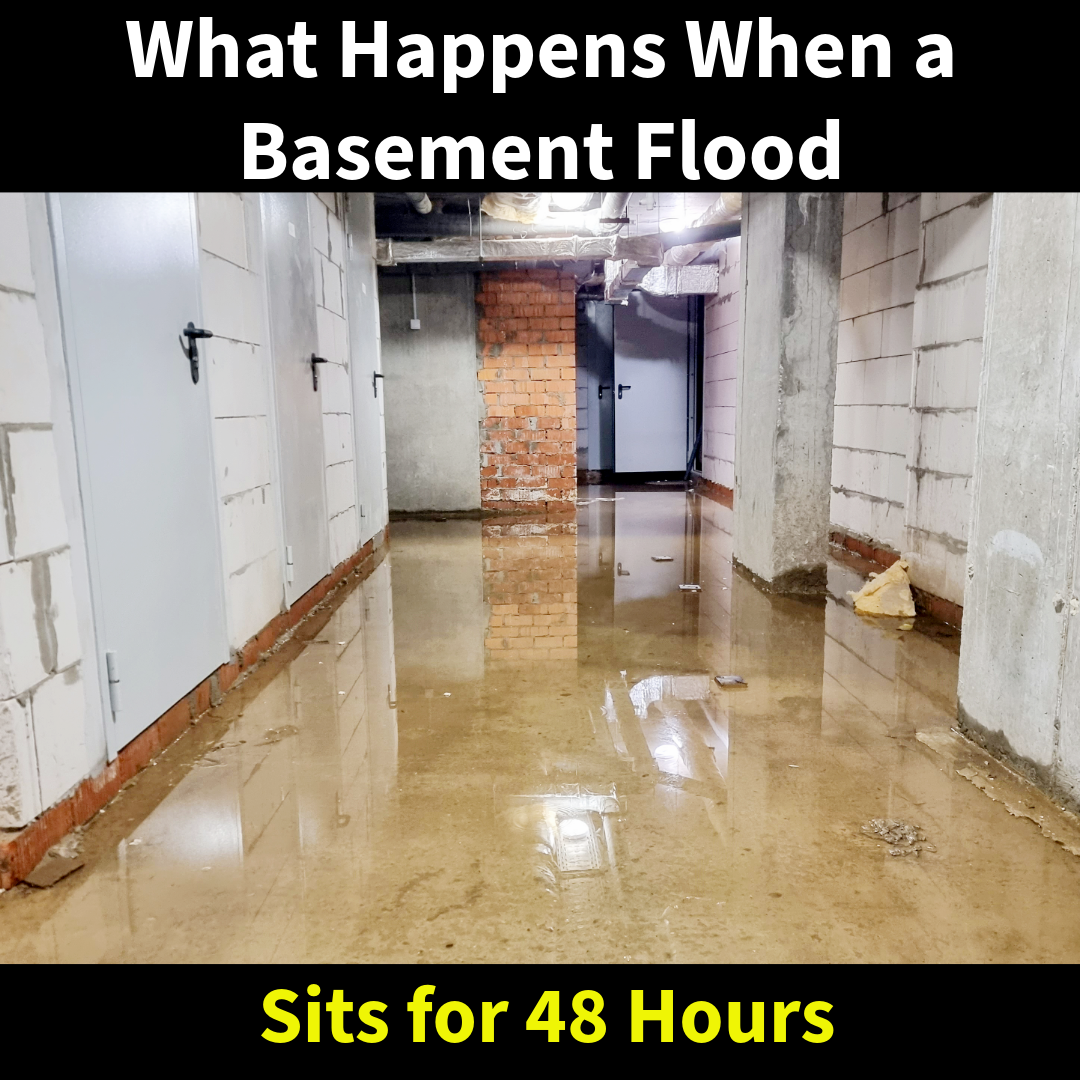
We get calls all the time where someone says it wasn’t that bad, or there wasn’t that much water. Then we get there and the entire basement needs to be gutted. The difference is almost always time. Forty eight hours is enough to turn a manageable situation into a full scale water damage restoration job.
The First 24 Hours Is Where You Have a Chance
When water first hits a basement, whether it’s from a sump pump failure, storm backup, or pipe leak, there is still a window where the damage is mostly surface level. At that point, materials are wet but not fully compromised. Carpet is saturated, flooring has absorbed some moisture, and walls may be damp at the base, but structurally things have not completely broken down.
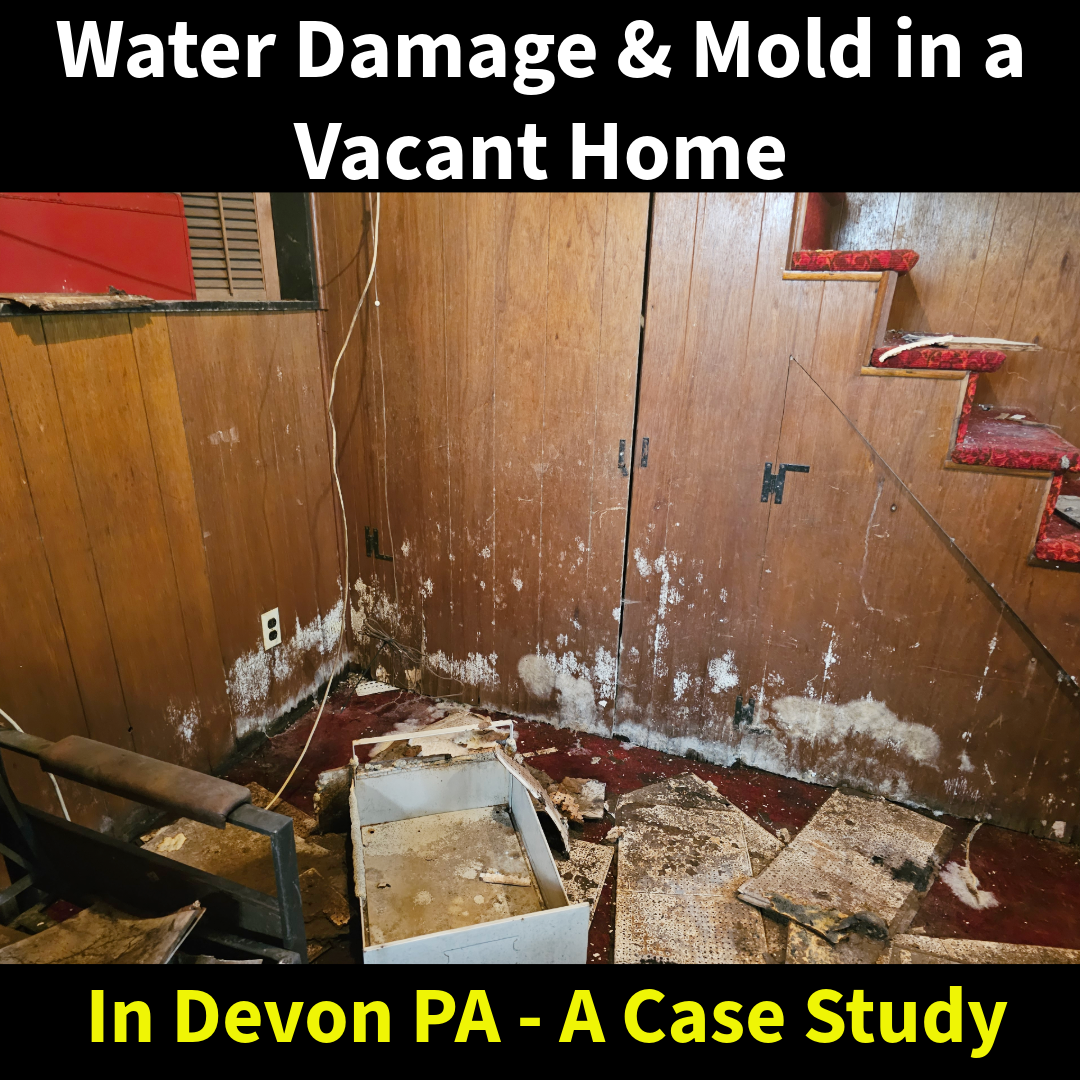
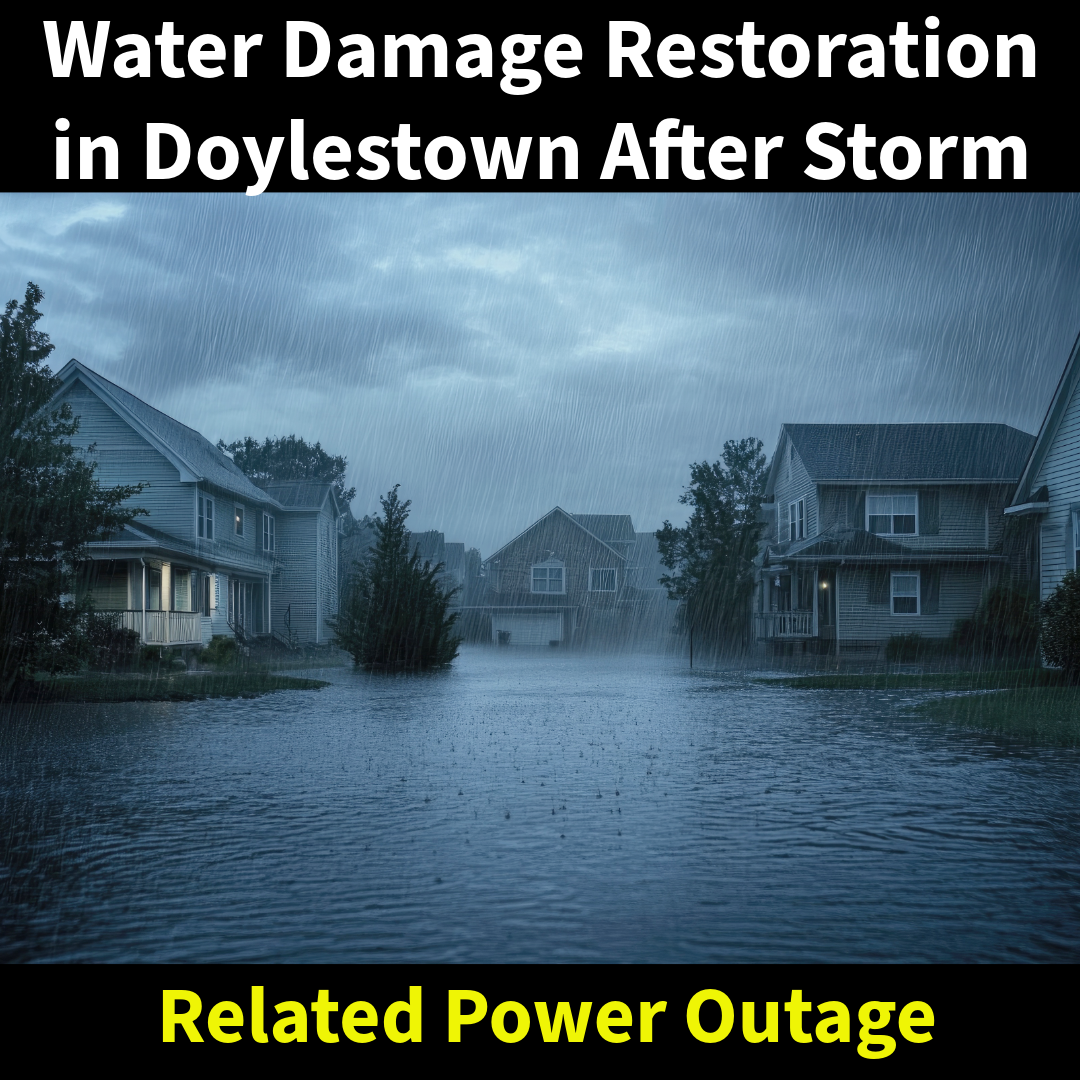
If water extraction and proper drying are started quickly, the spread can be controlled. In some cases, materials can be saved and the scope of work stays limited. The problem is most water damage situations are not handled that quickly. Power outages, vacant homes, or simply not realizing the extent of the issue all contribute to delays. That is when the situation starts to change.
What Happens After 48 Hours
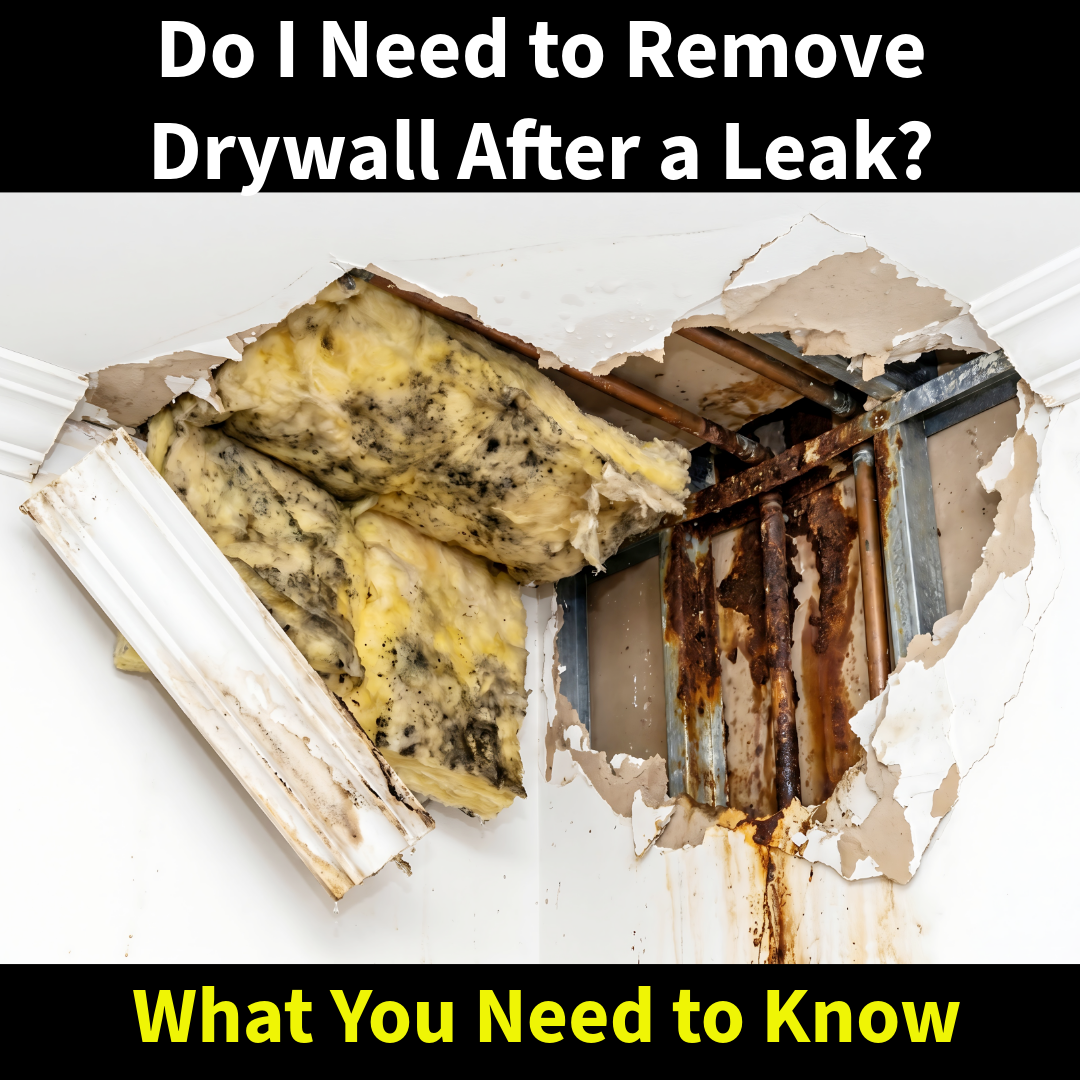
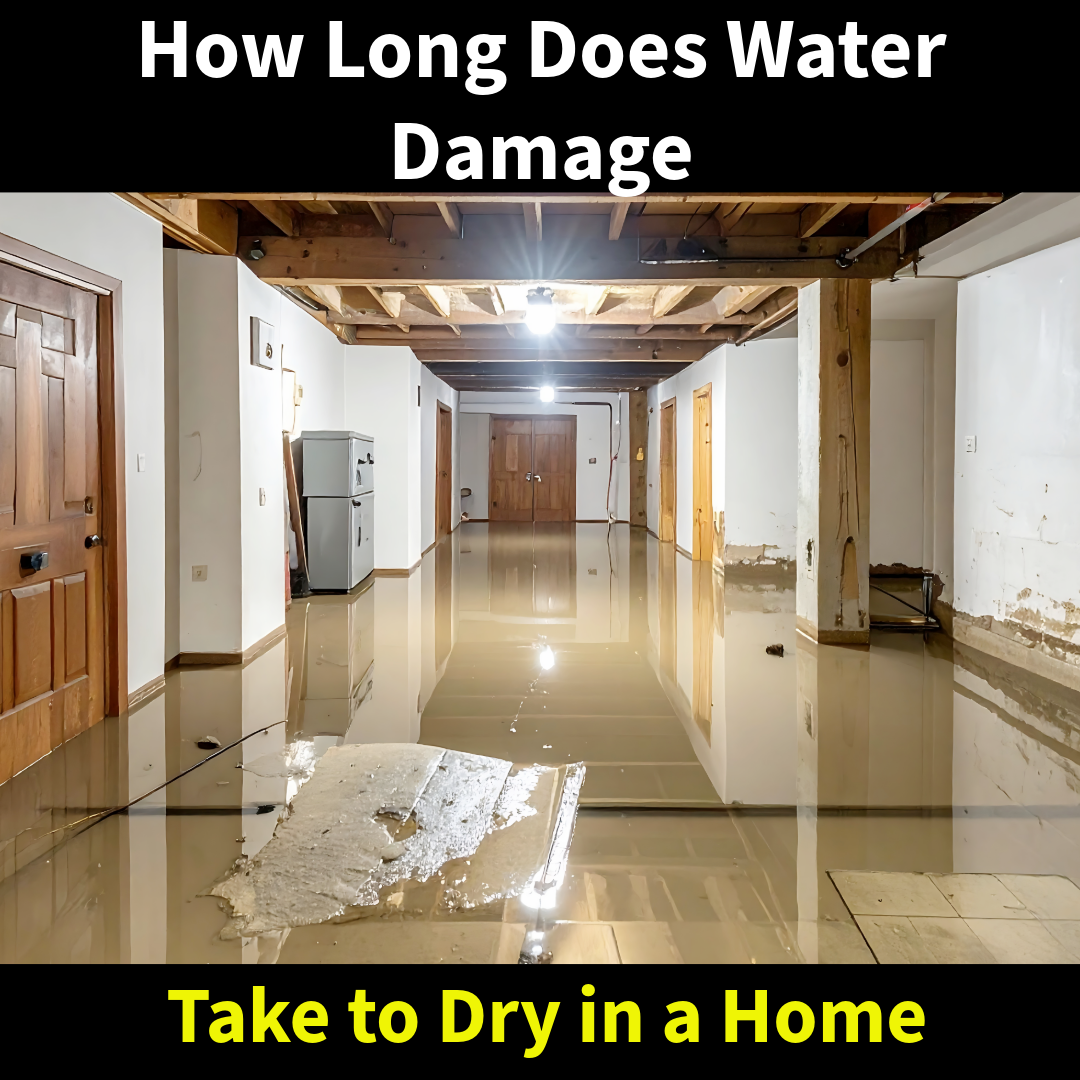
Once water sits for 48 hours, the situation is no longer just water damage. At that point you are dealing with deeper moisture intrusion, material breakdown, and the early stages of mold growth. The water is no longer just sitting on the surface. It has worked its way into drywall, sub-flooring, and framing. Drywall begins to wick moisture upward, often higher than what is visible. Wood materials absorb and retain moisture, causing swelling and instability. Finished flooring begins to buckle or separate, especially in enclosed basement environments where moisture has nowhere to escape.
At this stage, drying becomes much more involved because the moisture is inside the structure, not just on it.
When Water Turns Into a More Serious Loss
Another factor that changes over time is the condition of the water itself. Clean water does not stay clean. As it sits, especially in a basement, it comes into contact with materials, debris, and organic matter within the space.
What may have started as a cleaner water source can deteriorate in quality, which changes how the job must be handled. At that point, it is no longer just about drying materials. Removal, cleaning, and proper disinfection become necessary parts of the process.
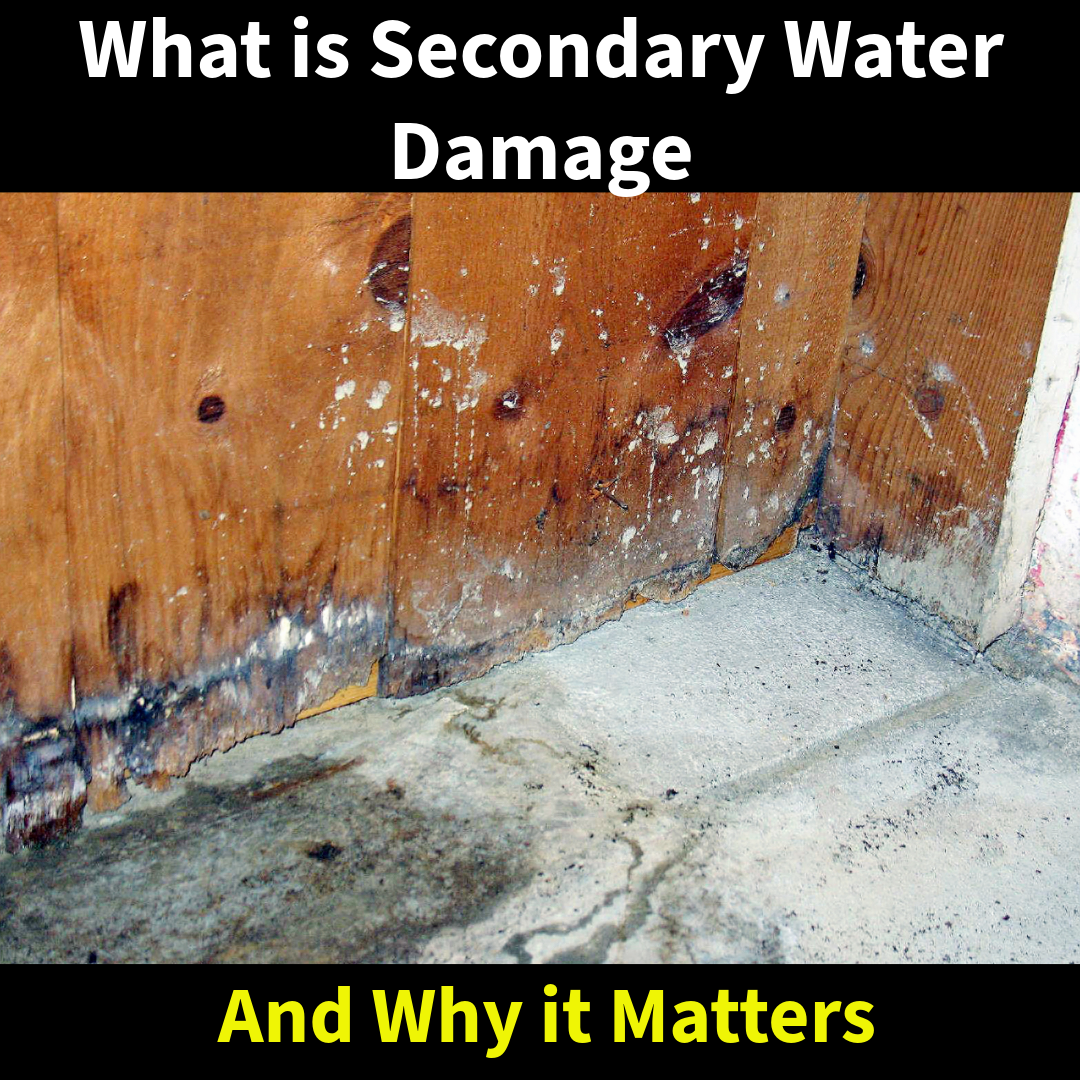
The Start of Mold Growth
Mold growth is one of the biggest concerns once water sits for an extended period of time. It does not take much for conditions to become favorable, especially in a basement where humidity levels are already elevated. The initial growth is usually not what people expect. It often starts in hidden areas such as inside wall cavities, behind drywall, or along sub-flooring and structural framing. By the time there is a visible issue or a noticeable odor, growth has already begun.
This is why so many water damage jobs that are left for a couple of days transition into mold remediation as well. The timeline is what drives that change.
Why Drying After the Fact Doesn’t Fix It
A common assumption is that once standing water is removed, the problem is resolved. In reality, that is only the first step. If materials have already absorbed moisture and sat long enough, simply running fans or opening windows will not reverse the damage. At that point, drywall may have lost its integrity, flooring may be permanently affected, and insulation can no longer be properly dried. In addition, microbial growth may already be present within those materials.
Proper water damage restoration involves more than air movement. It requires identifying where moisture has traveled, removing affected materials where necessary, and documenting conditions to ensure the structure is properly dried.
What We Typically See on These Jobs
By the time we are called out to a basement that has sat for 48 hours or more, the scope of work is almost always larger than the homeowner expects. What may have started as a smaller water issue often turns into removal of flooring, sections of drywall, and in some cases opening up wall cavities to address hidden moisture.
In many finished basements, the damage extends further than what is visible because moisture has already moved behind finished surfaces. This is where experience matters, knowing where to check and how far the damage may have spread.
The Reality of Waiting Too Long
The biggest issue is not the water itself, it is the delay in addressing it. The longer water sits, the more it spreads, the more materials are affected, and the more likely it is that mold will become part of the job.
What could have been handled with extraction and drying within the first day often turns into a much more involved restoration process after 48 hours. That means more demolition, more labor, and ultimately higher costs.
What to Remember
Water damage is not just about how much water enters a space. It is about how long it is allowed to remain there. A basement flood that sits for 48 hours is no longer a simple cleanup. It becomes a deeper structural and environmental issue that requires proper handling.
Acting quickly, starting proper water damage restoration immediately, and understanding how fast conditions can change are what make the difference between a manageable job and a full scale loss.