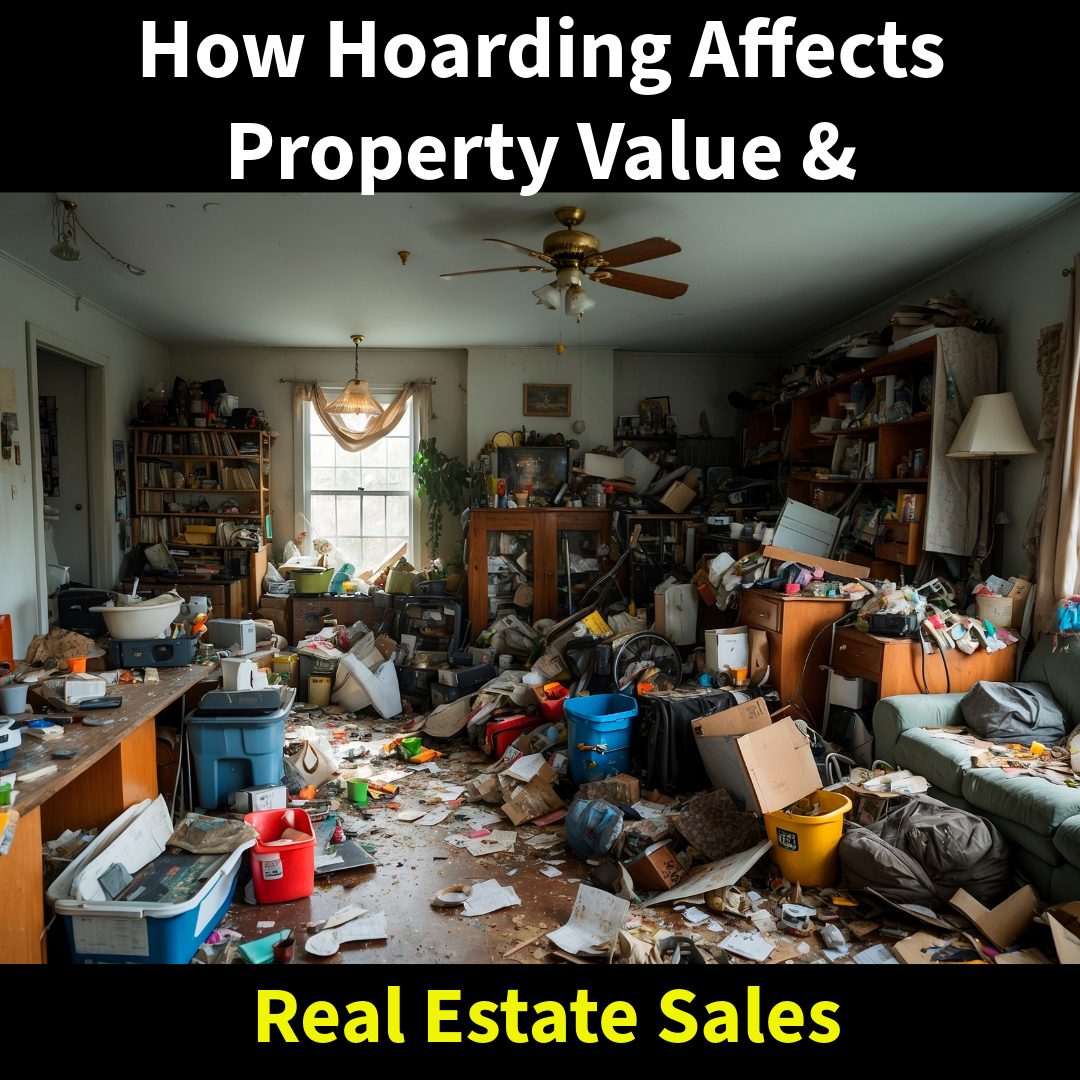
Professional Drying vs. DIY: How to Truly Dry Out Your Home and Prevent Mold

When water damage strikes — whether from a burst pipe, leaking appliance, or heavy rain — many homeowners reach for household fans and a store-bought dehumidifier, hoping that will solve the problem. While it may seem like a quick fix, these tools simply aren’t powerful enough to stop the hidden dangers that come with water damage. Without the right equipment and techniques, moisture lingers in your home’s structure, creating the perfect conditions for mold growth and costly repairs.

Why Household Equipment Falls Short

  • Fans: A box fan or ceiling fan circulates air, but it doesn’t create the high-velocity airflow needed to pull moisture out of walls, flooring, and other building materials.
  • Store-bought dehumidifiers: These units are designed for comfort in a bedroom or basement, not for drying a water-damaged structure. They pull out only a fraction of the moisture required, and can take weeks to have any impact. Meanwhile, mold has time to spread.

What Professional Equipment Does Differently

  • Commercial air movers: These machines blast air at floor level and across surfaces, forcing moisture out of wood, drywall, and carpeting.
  • Industrial dehumidifiers: Unlike small home units, professional dehumidifiers extract dozens — even hundreds — of pints of water per day, rapidly lowering humidity to safe levels.
  • Moisture meters and thermal imaging: Hidden dampness inside wall cavities or under flooring can’t be seen with the naked eye. Professional tools detect and verify that everything is truly dry.

Why Speed Matters: Stopping Mold Before It Starts

Time is critical after water damage. Mold can begin growing in as little as 24 to 48 hours if moisture is left unchecked. Even if a surface feels dry, deep inside the materials, moisture may still be present. Professional drying equipment ensures the structure is dried quickly and completely, cutting off mold before it has a chance to take hold.

Protecting Your Home and Health

Using household equipment may make the surface look better temporarily, but it doesn’t address the bigger issue. Without full structural drying, homeowners often face mold infestations, warped building materials, and persistent odors just weeks later. Professional equipment prevents these problems, saving money, time, and stress in the long run.

The MSI Difference

At MSI, we use advanced drying equipment and IICRC-certified techniques to restore homes the right way. Every job is documented with moisture readings to prove that your property is safe, dry, and mold-free. Choosing professional help isn’t just about convenience — it’s about protecting your home and your health.

Don’t risk mold and long-term damage by relying on household fans. Call MSI today at 215-339-1769 for fast, professional water damage restoration.

The Connection Between Mold and Chronic Sinus Infections

Most people think of mold as a problem that damages walls, ceilings, and basements — but the real danger is often in the air you breathe. One of the most overlooked health effects of indoor mold is its role in chronic sinus infections. If you or someone in your family deals with recurring sinus issues, mold in your home or workplace may be the hidden cause.


How Mold Affects Your Sinuses

Mold releases tiny spores that float through the air. When inhaled, these spores can irritate the lining of the nose and sinuses. Over time, constant exposure can cause inflammation that never fully heals, leaving you with:

  • Persistent congestion and runny nose
  • Headaches or facial pressure
  • Postnasal drip and sore throat
  • Recurring sinus infections that antibiotics don’t fully resolve

For people with allergies or weakened immune systems, the impact can be even more severe.


When Sinus Infections Become “Chronic”

Doctors usually define chronic sinusitis as sinus inflammation lasting 12 weeks or longer, even with treatment. Many patients cycle through multiple rounds of antibiotics with little relief. The reason? Medication can temporarily address the infection, but if mold spores are still present in your environment, the irritation and inflammation continue.


Signs Mold Could Be the Culprit

You might suspect mold is linked to your sinus problems if:

  • Symptoms worsen when you’re at home and improve when you’re away
  • You notice musty odors in certain rooms
  • You’ve had recent water damage or leaks
  • Other household members experience similar issues

What to Do If You Suspect Mold

  1. Schedule a Mold Inspection or Testing – A professional inspection can determine if mold is present and identify hidden growth.
  2. Address Water Damage Quickly – Mold thrives in damp conditions; any leak or flooding should be dried and cleaned fast.
  3. Don’t Rely on DIY Cleanups – Sprays or bleach don’t solve the problem and can make spores spread.
  4. Hire Certified Professionals – Proper containment, removal, and air filtration are critical to restoring healthy indoor air.

Protect Your Health with Professional Help

At MSI, we’ve been helping families and businesses address mold problems since 1998. Our certified team provides thorough inspections, safe removal, and expert guidance to restore both your property and your indoor air quality.

If you’re dealing with stubborn sinus issues that just won’t go away, it may be time to look beyond medicine and check your environment.

Call MSI today at 215-339-1769 to schedule a mold inspection and take the first step toward breathing easier.

When Sellers Hide Water & Mold Damage: A Costly Court Case in Radnor PA

I want to discuss a recent court case I was involved in that shows just how costly it can be when sellers fail to disclose water and mold damage.

This case took place in Radnor, PA, and it centered on a home that was listed for $1.2 million but ended up selling for $1.36 million. The sellers walked away with more than they were asking for, but instead of being upfront, they hid major problems that would eventually cost them dearly.

What the Buyers Didn’t See

From the very beginning, the buyers were rushed through walk-throughs. Both realtors created short, pressured windows that left little time to really evaluate the property. Behind the quick tours were years of water intrusion problems:

  • A leaking basement.
  • Roof failures that damaged three bedrooms.
  • Wall issues from poorly installed stucco and windows.

These weren’t surprises to the sellers. In fact, their own old social media posts—later uncovered by the buyers’ attorney—showed them talking about water problems in the basement.

The Lawsuit

After closing, the buyers realized the scope of the damage. They had used everything they had to purchase the property and couldn’t afford the massive repair costs. Their attorney filed a lawsuit seeking rescission—essentially asking the court to unwind the deal because the house had been misrepresented.

I testified in this case alongside other expert witnesses. We all confirmed the same thing: the damage wasn’t new and didn’t suddenly appear. It was long-term, ongoing, and deliberately covered up.

It wasn’t just the sellers who paid the price. The realtors were also sued and ultimately settled before the trial. They were found to be complicit in rushing the buyers through and not allowing proper inspection windows, and together they lost about $50,000.

The Outcome

Faced with overwhelming evidence, the sellers agreed to settle. They were forced to pay $230,000 plus more than $100,000 in legal fees. What looked like a profitable sale quickly turned into a financial disaster—all because of dishonesty.

The Lesson

The moral is simple: when selling a home, disclosure matters. Water damage and mold don’t just disappear, and covering them up is never worth the risk. Buyers may still move forward if issues are disclosed properly, but hiding them almost always ends in lawsuits and financial loss.

And for realtors, this case is a reminder that your actions matter too. Pushing buyers through rushed walkthroughs or glossing over concerns doesn’t just put your clients at risk—it can put you in the courtroom as well.

From my perspective, having been directly involved in this case, it’s clear that honesty and transparency protects everyone in the long run.

After the Flames: Why Boarding Up Your Home is Critical After a Fire

When a fire breaks out, the fire department’s priority is saving lives and stopping the flames. To do that, they often have to break windows, force open doors, or cut through the roof. While those actions are necessary in the moment, they leave your home exposed once the fire trucks leave.

That’s where emergency board-up services come in. Securing the property after a fire isn’t just about safety — it’s about protecting your home from further damage and making sure your insurance claim isn’t jeopardized.


Why Emergency Board-Up is Necessary

After a fire, your home is vulnerable. Gaping windows, broken doors, and damaged roofing allow:

  • Rain and snow to enter, leading to water and mold damage.
  • Thieves or vandals to gain easy access.
  • Animals and pests to make their way inside.

Worse, if someone enters your unsecured property and gets hurt, you could be held liable.


Common Openings After Fire Department Response

Even a small fire can leave a home wide open. It’s common to see:

  • Shattered windows from firefighting efforts.
  • Holes cut in the roof for ventilation.
  • Garage doors forced open or left inoperable.
  • Entry doors broken during rescue operations.

Every one of these openings is an invitation for more damage if left unattended.


The Risks of Leaving a Fire-Damaged Home Unsecured

  • Secondary water damage when rain or snow gets inside.
  • Structural deterioration as moisture weakens materials.
  • Theft of valuables, tools, or copper piping.
  • Legal and insurance issues if the property isn’t properly protected.

Insurance companies expect homeowners to take steps to mitigate further damage. Failing to secure your home can sometimes give them reason to reduce or deny coverage.


What Proper Board-Up Includes

Professional fire damage contractors like MSI move fast to:

  • Secure all windows, doors, and roof openings with plywood and heavy-duty tarps.
  • Install temporary fencing or barriers if necessary.
  • Change or secure locks to restrict access.
  • Provide documentation and photos for your insurance adjuster.

This isn’t a quick DIY project — it requires the right equipment and training to keep both you and the property safe.


Why Call MSI for Emergency Board-Up

Boarding up a fire-damaged home is about more than hammering in plywood. At MSI, we:

  • Respond 24/7 to secure properties the same day.
  • Follow IICRC safety standards for handling fire-damaged structures.
  • Provide the paperwork your insurance company expects.
  • Move seamlessly from board-up to fire and smoke cleanup, so you’re not juggling multiple contractors.

Protect Your Home Immediately

If you’ve just experienced a fire, don’t let your home sit exposed. A fast board-up is the first step toward recovery — and it prevents the situation from getting worse.

MSI is available 24/7 for emergency fire board-up and cleanup services. Call us today at 215-339-1769 to secure your property and start the restoration process.

Types of Mold Testing: Part 4 – Wall Cavity Testing

Not all mold problems grow in plain sight. Some of the most damaging infestations hide inside walls, under floors, or behind cabinets. These hidden areas stay damp long after a leak or flood, creating perfect conditions for mold growth. That’s why inspectors often use inner-wall cavity testing to confirm whether mold is present where you can’t see it.

How Cavity Testing Works

  • A trained inspector drills a small, discreet hole into the wall or ceiling near the suspected area.
  • A sterile tube or cassette is inserted to pull an air sample from inside the cavity.
  • The sample is sent to a certified laboratory, where spore counts are compared to baseline indoor and outdoor levels.

This process gives a direct look at what’s happening behind the surface — without having to tear down entire sections of drywall.

When It’s Used

  • Insurance Claim Disputes: Homeowners are often told “no visible damage, no problem.” Cavity testing can prove hidden mold exists and help validate claims.
  • Follow-Up to Positive Tests: If a surface or air sample in the room already showed elevated spores, cavity testing helps confirm whether mold is also thriving behind the walls.
  • Suspected Leaks: When there’s a history of plumbing issues, roof leaks, or water intrusion but no obvious staining, cavity testing can identify hidden moisture damage.
  • Mystery Odors: A persistent musty smell is often the first clue that mold is active behind finished surfaces.

Why It Matters

Mold hidden inside walls can spread unchecked for months, making remediation more invasive and expensive. By detecting the problem early, inner-wall cavity testing provides homeowners with clear answers — and the documentation they need when dealing with insurance companies, landlords, or contractors.

Protect Your Property with Expert Mold Testing

If you suspect hidden mold in your home or business, don’t wait for the damage to spread. At MSI, we use industry-standard testing methods, including cavity sampling, to uncover mold where it hides and provide you with a clear plan for remediation.

Why Insurance Companies Deny Water Loss Claims—and How to Protect Yourself

When water damage strikes, many homeowners assume their insurance policy will cover the loss. Unfortunately, that isn’t always the case. Insurance companies frequently deny water damage claims, often leaving families with unexpected repair bills and stressful disputes. Understanding why these denials happen can help you avoid pitfalls and strengthen your position if you ever need to file a claim.


Common Reasons Insurance Denies Water Damage Claims

1. “Long-Term” or “Gradual” Leaks
Most standard homeowners’ policies only cover sudden and accidental water damage. If an adjuster determines the loss was caused by a slow leak—such as a dripping pipe behind a wall over months or years—they may call it a “maintenance issue” and deny coverage.

2. Lack of Documentation
If you can’t prove when the damage happened or how it occurred, insurers may claim there’s not enough evidence to tie it to a covered event. Photos, videos, and professional inspection reports are critical in supporting your claim.

3. Excluded Sources of Water
Not all types of water damage are treated equally. For example, many policies exclude flood damage, water backing up through drains, or sewer/septic overflows unless you purchased separate coverage.

4. Mold Resulting from Water Damage
Even when water damage itself is covered, mold growth caused by that damage is often excluded—or capped at very low limits. This leaves homeowners responsible for expensive remediation. Insurance companies frequently argue that “mold takes a long time to grow,” labeling it as long-term damage. In reality, mold can begin germinating in as little as 24 to 48 hours after water intrusion, making this a common but misleading excuse for denial.


How to Protect Yourself Before and After a Loss

  • Know Your Policy: Take the time to read your coverage details, especially exclusions related to water damage, mold, sewer backups, and floods.
  • Act Quickly: The longer you wait to report or address water damage, the more likely your insurer will call it “long-term.” Contact a restoration professional immediately.
  • Document Everything: Photograph the damage from multiple angles, keep damaged materials, and request a professional inspection. Independent reports can make all the difference in disputes.
  • Request Clarification in Writing: If your claim is denied, ask for the specific policy language being used against you. This can give you leverage if you need to appeal.
  • Use Your Right to Choose a Contractor: Insurance companies may recommend preferred vendors, but you are legally allowed to hire the restoration company of your choice. Choosing a qualified, experienced team ensures the work is done right—not rushed to save the insurer money.

Final Thoughts

Water damage is stressful enough without fighting your insurance company. By understanding the most common reasons for claim denials and taking proactive steps to document and protect your property, you can strengthen your case and improve your chances of a successful payout.

If you’ve experienced water damage and want expert help not just with cleanup, but also with the documentation insurers demand, MSI is here to guide you through every step.

Best Ways to Prevent Water Damage This Fall

As summer heat fades and the leaves begin to fall, homeowners face a new set of risks when it comes to protecting their property. Autumn brings heavy rains, dropping temperatures, and plenty of debris that can quickly overwhelm your home’s defenses. Without proper preparation, these seasonal changes can lead to costly water damage that only worsens as winter approaches.

The good news? A few smart steps now can save you from major headaches later. Here are the best ways to keep your home dry and safe this fall.


Keep Water Flowing Away From Your Home

Falling leaves and twigs are more than just a chore — they can clog gutters and downspouts, forcing water to spill over and pool near your foundation. That water doesn’t just disappear; it seeps into basements and crawlspaces.

  • Clean gutters and downspouts regularly throughout the season.
  • Make sure downspouts extend far enough to direct water away from the house.
  • Check the grading around your home — soil should slope away, not toward your foundation.

Inspect Your Roof, Windows, and Doors

Your roof and exterior openings are the first line of defense against fall rains. After months of hot sun and summer storms, shingles and flashing may already be weakened.

  • Look for missing or curled shingles.
  • Inspect flashing around chimneys and vents.
  • Check windows and doors for gaps or failing caulk where water could seep in.

Protect the Basement and Crawlspace

The lowest parts of your home are often the first to show signs of water damage. As nights grow colder, small cracks in the foundation can widen, letting in seepage.

  • Seal visible cracks and monitor damp spots.
  • Test your sump pump by pouring water into the pit to ensure it runs properly.
  • If you don’t already have one, consider a battery backup system in case of power outages during fall storms.

Prepare Your Plumbing for Cooler Weather

Burst pipes may feel like a winter problem, but prevention starts in the fall. Once the first freeze arrives, unprotected outdoor plumbing is at risk.

  • Disconnect garden hoses and shut off outdoor spigots.
  • Insulate any exposed pipes in basements, garages, or crawlspaces.
  • Have your plumbing system checked for leaks before colder nights set in.

A Little Prevention Goes a Long Way

Taking time to handle these tasks now can help you avoid the stress and cost of water damage later in the season. Still, even the most prepared homeowner can’t always control what Mother Nature has in store.

If you notice signs of water damage — damp walls, musty odors, standing water, or mold — MSI is ready 24/7 to help. Our water damage restoration experts will quickly assess the problem, stop the damage from spreading, and restore your home so you can focus on enjoying the season.

📞 Call MSI anytime at 215-339-1769 for fast, reliable water damage restoration.

Types of Mold Testing: Part 3 — Bulk Sampling Explained

When it comes to mold testing, there isn’t a one-size-fits-all method. In our earlier posts, we covered air sampling and surface sampling, both of which are useful for detecting airborne spores and identifying mold growth on visible surfaces. But what if the concern runs deeper — inside the actual building materials? That’s where bulk sampling comes in.

What Is Bulk Sampling?

Bulk sampling involves physically removing a portion of a material suspected of mold contamination — such as a piece of drywall, insulation, wood, or carpet — and sending it to a laboratory for analysis. Unlike air testing, which measures spores in the environment, or surface testing, which captures mold directly from a wall or countertop, bulk sampling provides direct evidence of what’s inside the material itself.

How the Process Works

  1. Selection of the Sample Area – A certified inspector identifies the material most likely to show contamination. This might be drywall around a window leak, flooring in a basement, or insulation inside a wall cavity.
  2. Careful Removal – A small section of the material is cut out using sterile tools. It must be handled carefully to avoid cross-contamination.
  3. Sealed for Transport – The sample is placed in a sterile container or bag and labeled with the exact location it came from.
  4. Laboratory Analysis – At the lab, technicians examine the material under a microscope and may perform cultures to identify the exact type of mold and the extent of colonization.
  5. Report & Interpretation – The results are compared against industry standards and presented in a clear report that homeowners, insurance adjusters, or even courts can understand.

Why Bulk Sampling Matters

Bulk sampling is not always necessary, but when it is, it can be the deciding factor in serious cases:

  • Insurance & Legal Disputes – A homeowner claiming hidden water damage or a tenant alleging unsafe living conditions often needs indisputable proof. A piece of mold-infested drywall carries far more weight than air readings alone.
  • Remediation Decisions – Sometimes materials can be cleaned and salvaged. Other times, replacement is unavoidable. Bulk sampling helps make that call with certainty.
  • Health & Safety – If mold is inside porous materials, it can continue spreading even if the surface looks clean. This test reveals contamination most people can’t see.

A Real-World Scenario

Consider a homeowner who notices a musty odor in their finished basement but sees no visible mold. Air samples show elevated spore counts, but the insurance company questions the source. During inspection, we identify staining on a small section of drywall near the baseboard. A bulk sample is collected and sent to the lab, which confirms active mold growth within the gypsum core. This undeniable evidence proves the presence of hidden contamination, helping the homeowner secure coverage for full remediation.

Pros & Cons of Bulk Sampling

Pros:

  • Conclusive, physical evidence of contamination.
  • Strong documentation for lawsuits, insurance claims, and disclosure cases.
  • Guides clear remediation decisions.

Cons:

  • Destructive — requires cutting into building materials.
  • Limited to the exact spot tested, meaning other areas may still need further investigation.
  • More time-intensive than surface swabs.

Final Thoughts

Bulk sampling may not be needed for every project, but when legal, insurance, or health questions arise, it can be the most powerful tool in mold testing. With over 27 years of experience, MSI has performed thousands of tests and has been called upon as an expert witness in countless disputes. Our team knows when bulk sampling is the right step — and how to use it to give homeowners the clarity they need.

A Fresh Start: Hoarding Cleanup Success Story in Paoli, PA

Hoarding is often misunderstood. It’s not simply about having “too much stuff” — it’s about the challenges someone faces when their home becomes unsafe or overwhelming. Recently, our team at MSI was called to a home in Paoli, PA, where one family’s story shows just how life-changing the right help can be.

The Call for Help

A mother reached out to us, concerned about her daughter who had been struggling with hoarding and living in unsafe conditions. The home had very few walkable pathways, and clutter was piled in ways that hid serious issues like water damage and mold growth from past leaks. On top of that, a beloved cat was using the carpet as a bathroom, making the environment even more unsanitary.

The daughter made a courageous step — she admitted she needed help and wanted her story shared, privately, to encourage others who might be in the same situation.

What We Found Inside

When we arrived, it was clear this wasn’t just a case of “too many belongings.” The conditions created real health and safety concerns:

  • Blocked pathways made moving around dangerous in the event of an emergency.
  • Hidden mold and water damage were worsening behind piles of clutter.
  • Animal waste on the carpets posed biohazard risks.
  • Underlying plumbing and electrical issues needed to be addressed for the home to be safe again.

Restoring the Home — and Peace of Mind

Our team carefully sorted, removed, and cleaned the property, always with compassion and respect for the homeowner. We remediated the mold, addressed the water damage, and pointed out the additional repairs needed for long-term safety.

This was about more than just cleaning a house. It was about helping someone reclaim their home and their health.

A Positive Outcome

The best part of this story is its ending — or rather, its new beginning. The homeowner has now been back in her Paoli home for over a year. She’s maintained a safe, clean environment and hasn’t fallen back into old habits. Her courage in facing the problem and asking for help gave her the fresh start she deserved.

Helping Others Move Forward

At MSI, we understand that hoarding cleanup is about more than clutter. It’s about compassion, safety, and a second chance at living comfortably at home. If you or a loved one is facing a similar situation, know that you’re not alone.

📞 Call us today at 215-339-1769 for confidential help.

Why Sewage Losses Happen – Causes, Risks, and the Right Way to Clean Them

When most people think of water damage, they picture a burst pipe or a leaky roof. But sewage losses are far more dangerous and destructive. Unlike clean or gray water leaks, sewage water (also known as Category 3 water) is highly contaminated and requires immediate professional cleanup. Understanding why sewage losses happen — and how to respond — can help protect your health, your home, and your investment.


What Is a Sewage Loss?

A sewage loss occurs when wastewater backs up into a home or business instead of draining properly. This water isn’t just dirty — it contains harmful bacteria, viruses, parasites, and chemical contaminants. Because sewage can spread quickly through flooring, walls, and personal belongings, every hour of delay makes cleanup more complex and costly.


The Most Common Causes of Sewage Losses

  1. Aging or Damaged Sewer Lines
    Many properties still rely on older clay, cast iron, or Orangeburg pipes that deteriorate over time. Cracks, collapses, and corrosion can all cause sewage to back up into a property.
  2. Tree Root Intrusion
    Roots naturally seek moisture and can break into underground sewer pipes through tiny cracks or loose joints. Once inside, they expand, creating blockages that force sewage back into the property.
  3. Heavy Rains and Flooding
    When municipal sewer systems are overwhelmed by storms or snowmelt, excess water can push sewage backwards into homes — particularly basements and first floors.
  4. Clogs from Improper Disposal
    Flushing non-flushable items like wipes, paper towels, hygiene products, or pouring grease down drains creates blockages that prevent proper flow. Over time, this leads to sudden and messy backups.
  5. Sewer Line Breaks or Misalignment
    Shifting soil, construction activity, or poor installation can cause joints to separate, collapse, or misalign. This restricts sewage flow and increases the risk of backups.

Why Sewage Backups Are So Dangerous

  • Serious Health Hazards
    Category 3 water contains pathogens that can cause gastrointestinal illness, skin infections, and respiratory problems. Direct contact or even airborne exposure can be harmful.
  • Extensive Property Damage
    Sewage water saturates drywall, flooring, insulation, and furniture. Most porous materials must be removed, not just cleaned, to prevent long-term contamination.
  • Lingering Odors and Hidden Contamination
    Even after water is removed, dangerous bacteria can remain inside building materials, causing odors and long-term health risks if not properly treated.

Why Professional Cleanup Is Essential

Sewage losses are not a DIY job. Shop-vacs, mops, and household disinfectants cannot fully sanitize a contaminated area. Professional sewage cleanup includes:

  • Full Safety Precautions – Crews wear PPE including respirators, gloves, and protective suits.
  • Specialized Extraction – Industrial pumps and vacuums remove contaminated water quickly.
  • Controlled Demolition – Unsalvageable materials such as carpet, insulation, and drywall are safely removed.
  • Disinfection & Sanitization – EPA-approved disinfectants are applied to all affected surfaces.
  • Structural Drying – Dehumidifiers and air movers prevent mold growth after cleanup.

Protecting Your Property from Future Sewage Losses

While not all sewage losses are preventable, there are steps you can take to reduce risk:

  • Schedule routine inspections of older sewer lines.
  • Avoid planting trees near underground sewer pipes.
  • Install a backwater valve to prevent municipal backups during storms.
  • Never flush wipes, feminine products, or paper towels — even if labeled “flushable.”
  • Properly dispose of cooking grease instead of pouring it down drains.

Fast Response Matters

Every minute counts during a sewage loss. Delaying cleanup can mean higher repair costs, more property damage, and greater health risks.

At MSI, our trained teams are available 24/7 for emergency sewage cleanup and water damage restoration. We follow strict industry standards to remove hazardous water, sanitize the property, and restore it safely — giving you peace of mind when you need it most.

Call MSI today at 215-339-1769 for immediate sewage cleanup services.