The Hidden Truth About Water Damage Invoices

After a flood or major leak, most homeowners are relieved when a restoration company steps in to “handle everything” with the insurance carrier. On the surface, it sounds like a stress-free solution — but too often, the reality is very different.

In many cases, these companies take full control of billing and communication with the insurance adjuster, leaving the homeowner completely out of the loop. The result? Inflated invoices, questionable charges, and homeowners stuck with surprise bills they never saw coming.

How Insurance Billing in Restoration Actually Works

When a water loss is filed as an insurance claim, restoration companies usually submit an itemized invoice or estimate directly to the insurance carrier. These invoices are often created using a pricing platform called Xactimate, which standardizes costs for materials, equipment, and labor.

There’s nothing inherently wrong with that system — it’s designed to keep billing consistent. The problem arises when companies inflate the scope of work or charge for services never performed, assuming the customer will never see the invoice. Because they’re dealing directly with the insurer, they rely on the fact that most homeowners will never request a detailed copy.

When the Homeowner Asks for the Invoice

Here’s where it gets concerning: in many of these cases, when a homeowner asks for a copy of their invoice, the company either ignores the request or claims that it’s “between them and the insurance company.” That’s a red flag.

You, as the policyholder, have every right to see what’s being billed under your name and claim number. You are the insured party — not the contractor, not the adjuster, and not the vendor. Any legitimate company should have no issue sharing that invoice with you line by line.

Overbilling and “Phantom” Charges

Some restoration companies take advantage of the lack of transparency by padding invoices with unnecessary or duplicated charges — for example:

  • Equipment left longer than required but billed at full daily rates
  • Materials charged at replacement cost when repairs were minimal
  • Mold or antimicrobial treatments billed but never documented

Because the invoice goes straight to the insurer, homeowners never realize what was claimed under their policy. And if the insurance company denies part of the payment — due to overbilling or unsupported charges — the homeowner can suddenly find themselves sent to collections for the unpaid balance.

The “We’ll Bill Your Insurance Directly” Trap

A common sales pitch in the industry is, “You don’t have to worry about payment — we’ll bill your insurance directly.”
While that can sound convenient, it often means the company will:

  • Bypass you completely during billing
  • Inflate the total claim value to maximize payout
  • Blame the insurer if part of the invoice isn’t covered
  • Send you the balance due, even though you never approved the charges

Homeowners assume the insurance company will handle everything, but when the carrier rightfully pushes back against inflated costs, the customer becomes the one stuck in the middle.

Why Transparency Matters — And What Sets Honest Companies Apart

At MSI, we take a completely different approach. Every customer receives a line-by-line invoice outlining each piece of equipment, material, and labor cost. Nothing is hidden, and nothing is added without documentation.

You see exactly what your insurance carrier sees — down to the drying equipment, square footage treated, and time spent on-site. That transparency ensures trust and protects both the homeowner and the insurance company from billing disputes later on.

We believe in straightforward, honest communication. If an insurance company refuses to cover a portion of the invoice, you’ll know exactly why — and what was actually performed on your property.

Protect Yourself From Restoration Billing Scams

If you’ve had water damage and plan to file a claim, here’s how to protect yourself:
✅ Always ask for a copy of the full invoice or estimate before it’s sent to the insurer.
✅ Make sure the company provides photos, readings, and documentation to support their charges.
✅ Avoid signing “direct payment” agreements unless you’ve reviewed the billing process.
✅ Choose companies that communicate clearly and give you documentation at every step.

Water damage is stressful enough — you shouldn’t have to question whether the company helping you is being honest. A legitimate restoration company will always be transparent, share their invoice, and make sure you understand every part of the claim.

📞 For transparent, professional water damage restoration and testing services, call MSI at 877-712-1600.
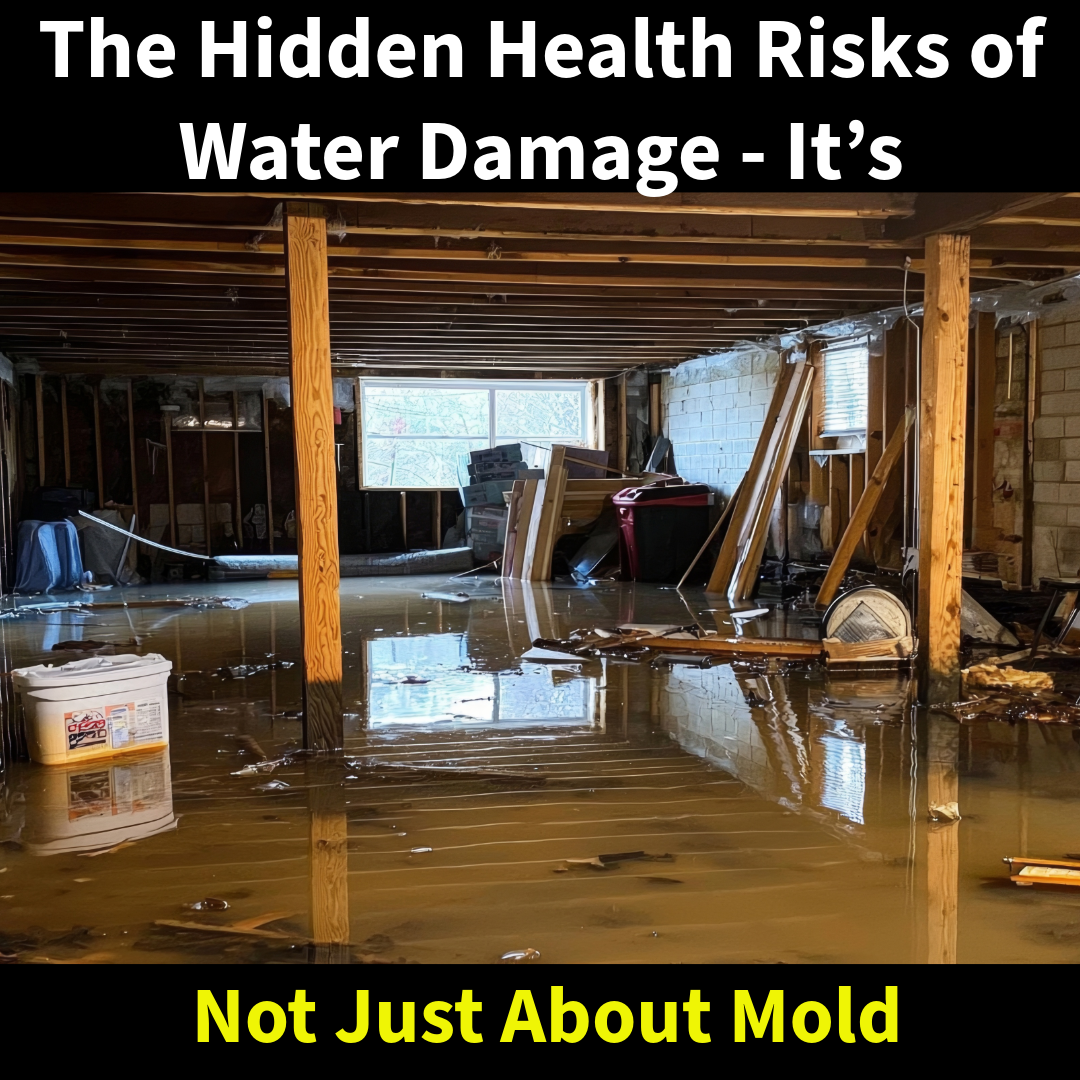
The Hidden Health Risks of Water Damage — It’s Not Just About Mold

When most people think about water damage, the first concern that comes to mind is mold — and for good reason. But mold isn’t the only danger that comes from a water loss. Depending on the source and type of water, your home or business could also be contaminated with bacteria, viruses, or other harmful microorganisms long before any visible mold appears.

Understanding the Different Categories of Water Damage

Not all water damage is the same. The restoration industry divides water losses into three categories based on contamination levels:

  • Category 1 – Clean Water: Comes from a sanitary source like a broken supply line or sink overflow. While this type starts clean, it quickly becomes contaminated after contacting surfaces like drywall, carpet, or dust.
  • Category 2 – Gray Water: Contains some level of contamination. Common sources include washing machines, dishwashers, sump pump failures, or rainwater leaks. It can cause illness or irritation on contact.
  • Category 3 – Black Water: The most hazardous category. This includes sewage backups, floodwater, or drain overflows. Black water contains bacteria, pathogens, and potentially harmful chemicals that can lead to infection or respiratory illness.

Even if the water looks clear, once it touches porous materials or sits for more than 24 hours, it can develop harmful microbial activity that poses serious health risks.

Airborne Contamination After a Water Loss

Water damage isn’t limited to wet surfaces. When moisture evaporates, it can carry aerosolized contaminants into the air, including bacteria, spores, and toxins. These particles can move through HVAC systems and spread to unaffected parts of the property.
That’s why professional restoration includes air filtration, containment barriers, and post-cleaning testing — not just drying.

Common Health Symptoms After Exposure

Homeowners and occupants exposed to contaminated water may experience symptoms such as:

  • Respiratory irritation or coughing
  • Skin rashes or infections
  • Headaches or fatigue
  • Nausea or gastrointestinal discomfort

These effects are often mistaken for allergies or seasonal illness, but in reality, they may come from bacteria, chemicals, or mycotoxins released during a water loss.

Why Fast, Professional Cleanup Matters

MSI’s water damage restoration process follows IICRC standards to identify and remove contamination safely. Every loss starts with source identification and moisture mapping, followed by sanitization and structural drying.
For gray and black water incidents, we use EPA-registered disinfectants, remove contaminated materials, and document every step for insurance purposes.

Delays in cleanup can lead to bacterial growth, cross-contamination, and long-term odor problems — even if the water appears gone on the surface.

Protecting Your Property and Health

If you experience water damage, don’t assume it’s safe just because the surface looks dry. Hidden cavities, insulation, and subfloors can hold contamination long after visible moisture is gone.

MSI provides professional testing and restoration to identify what’s in your water loss and remove health risks completely.

📞 Call MSI at 877-712-1600 for 24/7 emergency water damage restoration and environmental testing services throughout Pennsylvania, New Jersey, and Delaware.

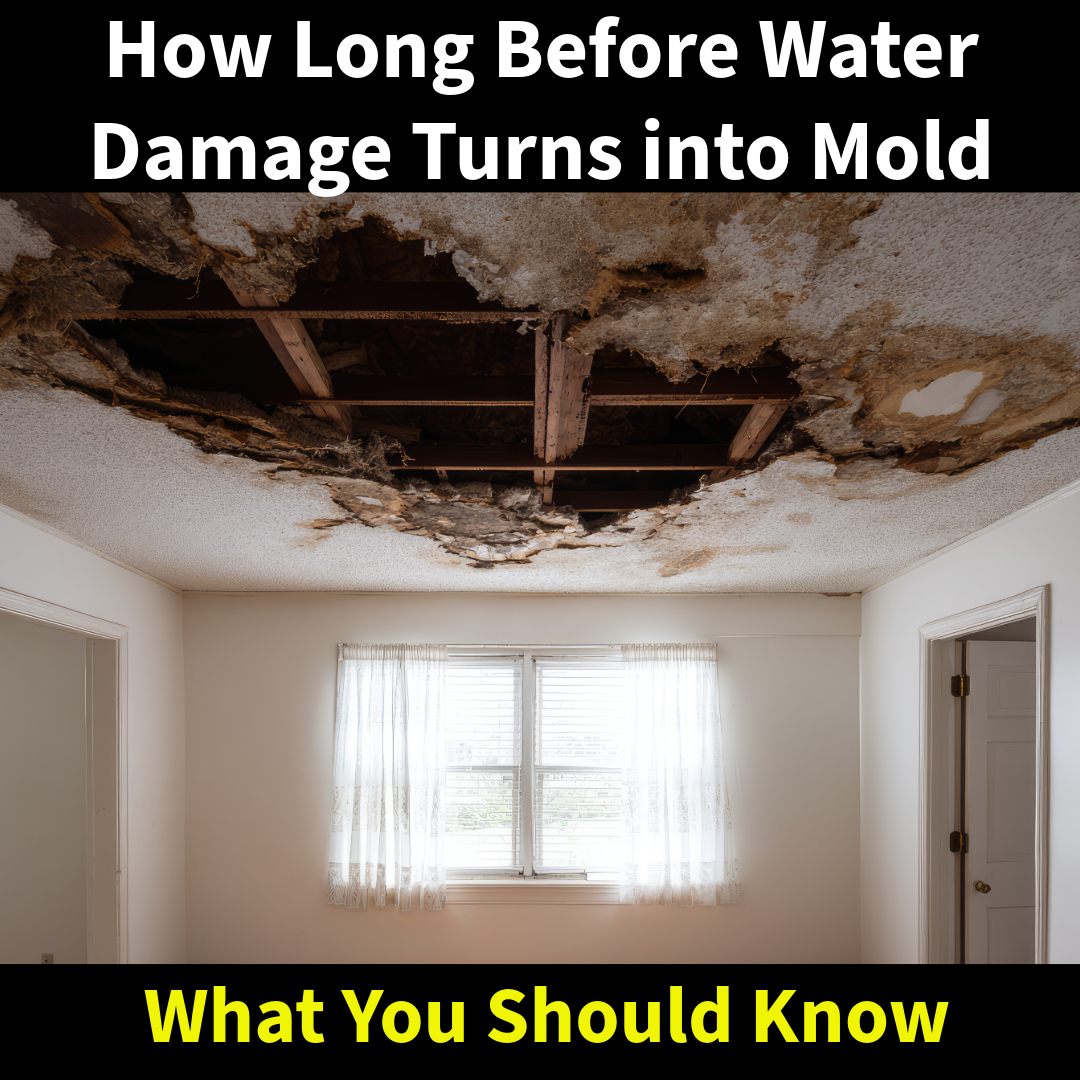
How Long Before Water Damage Turns Into Mold

When water enters your home — whether from a leak, burst pipe, or storm — time becomes the most important factor in preventing mold. Many homeowners assume they have days or even weeks to dry things out, but in reality, mold can begin to develop much faster than most people think.

The 24 to 48 Hour Window

Under the right conditions, mold can start growing within 24 to 48 hours after water exposure. All it needs is moisture, warmth, and a food source — such as drywall, carpet, or wood. Once those conditions exist, mold spores that are naturally present in the air can attach and start spreading.

Even if a surface looks dry on the outside, materials like drywall and subflooring often retain moisture underneath. That hidden dampness is what allows colonies to form out of sight.

Why Fast Drying Matters

The key to preventing mold after water damage is immediate and thorough drying. Fans and dehumidifiers can help, but they only go so far without professional moisture mapping and structural drying.

Moisture often seeps into wall cavities, insulation, or flooring layers — areas that standard household fans can’t reach. If those pockets aren’t addressed quickly, they can become hidden breeding grounds for mold that appear weeks later as stains, odors, or soft spots.

Signs Mold Is Starting to Grow

If you’ve had water damage recently, look for early indicators of mold activity:

  • A musty or earthy smell in affected areas
  • Discoloration or dark spots on walls, ceilings, or baseboards
  • Peeling paint or bubbling drywall
  • Worsening allergy or respiratory symptoms indoors

These are all signs that mold is developing behind the surface — even if you can’t see it yet.

How MSI Handles Water and Mold Damage

At MSI, we use professional-grade equipment to detect and eliminate hidden moisture before mold has a chance to spread. Our process includes:

  • Moisture mapping to find trapped water inside walls and floors
  • Targeted drying with industrial dehumidifiers and air movers
  • Mold testing when needed to confirm the environment is safe
  • Full remediation if growth is detected

By acting fast, we can often stop the problem before it turns into a full remediation project.

Protecting Your Property After a Leak

If you experience any type of water damage, don’t wait. The difference between a quick cleanup and a costly mold remediation is often just a matter of hours.

Call MSI as soon as water damage occurs — our team is available 24/7 to inspect, dry, and restore your property before mold takes hold.

🍁 How to Prepare Your Home for Fall: A Smart Checklist to Prevent Costly Damage

As summer gives way to cooler air and falling leaves, your home faces a whole new set of seasonal risks. From hidden leaks to clogged gutters, fall can quietly set the stage for water damage, mold growth, and other issues that are far more expensive to fix once winter hits.

Before you kick back with pumpkin coffee and football, take some time to walk through this fall home checklist. These simple steps can help you avoid major damage — and they’re all based on real conditions we see in homes every fall.


✅ Fall Home Prep Checklist: 10 Must-Do Items

1. Clean Your Gutters and Downspouts

Fallen leaves and debris pile up fast in gutters. When that happens, rainwater can’t drain properly — instead, it overflows and runs down the side of your home or backs up under shingles. This leads to siding damage, roof leaks, and water entering behind walls where mold loves to grow.

2. Inspect Your Roof for Damage

Fall storms bring high winds and driving rain. Now is the time to look for missing shingles, cracked flashing, or any signs of sagging or soft spots. Even a minor roof issue can let water seep in, often unnoticed until it causes a visible stain or mold problem indoors.

3. Seal Foundation Cracks

As temperatures drop, small cracks in your foundation can widen and allow water to seep in — especially when wet leaves pile up around the base of your home. If you have a basement or crawlspace, that moisture becomes trapped air, leading to mold, rot, and poor indoor air quality.

4. Replace HVAC Filters and Check Vents

After running air conditioning all summer, your HVAC system may be full of dust, pollen, and mold spores. Changing the filter improves air quality and helps your heat run more efficiently. While you’re at it, check for any moisture around HVAC ducts, especially in attics or closets — fall is prime time for condensation to start creating problems.

5. Inspect Your Attic for Moisture or Insulation Gaps

Heat rises — and if your attic isn’t sealed properly, warm air escaping into a cool attic can create condensation. Look for damp wood, mold on the roof sheathing, or signs of animal activity. Attic mold is one of the most common issues we get called to inspect after fall transitions.

6. Rake Leaves Away from Your Home’s Perimeter

Don’t let leaves pile up against the foundation. They trap moisture and block natural drainage, which leads to soil saturation and water pushing into the basement or crawlspace. A simple rake job can make all the difference.

7. Test Your Sump Pump & Basement Drainage

Fall rains can be intense — especially after a dry summer. If you have a sump pump, pour water into the pit to ensure it activates and drains properly. Also, make sure exterior grading isn’t sending water toward your home. One failed sump pump can flood a basement in under an hour.

8. Check Fireplaces and Chimneys for Odor or Blockage

Even if you haven’t used it in months, your fireplace can build up soot, puffback residue, or even animal nesting. A blocked flue can push smoke and odor back into your home the first time you light a fire — not to mention serious carbon monoxide risk.

9. Seal Up Windows and Doors

Drafty windows don’t just let in cold air. They let in moisture, which can condense on cold surfaces, rot wood framing, and spark mold growth around sills or baseboards. Caulking, weather stripping, or upgrading insulation now can prevent that damage from showing up in December.

10. Do a Quick Walkaround After Every Fall Storm

Take five minutes after a heavy rain or windstorm to walk your property. Look for standing water, wet siding, roof damage, or water stains. Catching these problems early is what separates a simple fix from a multi-thousand-dollar remediation job.

Final Thoughts

Fall might feel like a calm season, but it quietly introduces some of the biggest threats to your home — from moisture buildup to ventilation issues that go unnoticed until it’s too late. Small problems like clogged gutters or minor leaks have a way of turning into major headaches once the cold sets in.

Taking the time now to prep your home doesn’t just protect your property — it protects your family’s health and peace of mind. And if you ever notice musty odors, unexplained stains, or suspect mold or water damage, MSI is here to help with real answers and reliable service backed by decades of experience.

Best Ways to Prevent Water Damage This Fall

As summer heat fades and the leaves begin to fall, homeowners face a new set of risks when it comes to protecting their property. Autumn brings heavy rains, dropping temperatures, and plenty of debris that can quickly overwhelm your home’s defenses. Without proper preparation, these seasonal changes can lead to costly water damage that only worsens as winter approaches.

The good news? A few smart steps now can save you from major headaches later. Here are the best ways to keep your home dry and safe this fall.


Keep Water Flowing Away From Your Home

Falling leaves and twigs are more than just a chore — they can clog gutters and downspouts, forcing water to spill over and pool near your foundation. That water doesn’t just disappear; it seeps into basements and crawlspaces.

  • Clean gutters and downspouts regularly throughout the season.
  • Make sure downspouts extend far enough to direct water away from the house.
  • Check the grading around your home — soil should slope away, not toward your foundation.

Inspect Your Roof, Windows, and Doors

Your roof and exterior openings are the first line of defense against fall rains. After months of hot sun and summer storms, shingles and flashing may already be weakened.

  • Look for missing or curled shingles.
  • Inspect flashing around chimneys and vents.
  • Check windows and doors for gaps or failing caulk where water could seep in.

Protect the Basement and Crawlspace

The lowest parts of your home are often the first to show signs of water damage. As nights grow colder, small cracks in the foundation can widen, letting in seepage.

  • Seal visible cracks and monitor damp spots.
  • Test your sump pump by pouring water into the pit to ensure it runs properly.
  • If you don’t already have one, consider a battery backup system in case of power outages during fall storms.

Prepare Your Plumbing for Cooler Weather

Burst pipes may feel like a winter problem, but prevention starts in the fall. Once the first freeze arrives, unprotected outdoor plumbing is at risk.

  • Disconnect garden hoses and shut off outdoor spigots.
  • Insulate any exposed pipes in basements, garages, or crawlspaces.
  • Have your plumbing system checked for leaks before colder nights set in.

A Little Prevention Goes a Long Way

Taking time to handle these tasks now can help you avoid the stress and cost of water damage later in the season. Still, even the most prepared homeowner can’t always control what Mother Nature has in store.

If you notice signs of water damage — damp walls, musty odors, standing water, or mold — MSI is ready 24/7 to help. Our water damage restoration experts will quickly assess the problem, stop the damage from spreading, and restore your home so you can focus on enjoying the season.

📞 Call MSI anytime at 215-339-1769 for fast, reliable water damage restoration.

Why Sewage Losses Happen – Causes, Risks, and the Right Way to Clean Them

When most people think of water damage, they picture a burst pipe or a leaky roof. But sewage losses are far more dangerous and destructive. Unlike clean or gray water leaks, sewage water (also known as Category 3 water) is highly contaminated and requires immediate professional cleanup. Understanding why sewage losses happen — and how to respond — can help protect your health, your home, and your investment.


What Is a Sewage Loss?

A sewage loss occurs when wastewater backs up into a home or business instead of draining properly. This water isn’t just dirty — it contains harmful bacteria, viruses, parasites, and chemical contaminants. Because sewage can spread quickly through flooring, walls, and personal belongings, every hour of delay makes cleanup more complex and costly.


The Most Common Causes of Sewage Losses

  1. Aging or Damaged Sewer Lines
    Many properties still rely on older clay, cast iron, or Orangeburg pipes that deteriorate over time. Cracks, collapses, and corrosion can all cause sewage to back up into a property.
  2. Tree Root Intrusion
    Roots naturally seek moisture and can break into underground sewer pipes through tiny cracks or loose joints. Once inside, they expand, creating blockages that force sewage back into the property.
  3. Heavy Rains and Flooding
    When municipal sewer systems are overwhelmed by storms or snowmelt, excess water can push sewage backwards into homes — particularly basements and first floors.
  4. Clogs from Improper Disposal
    Flushing non-flushable items like wipes, paper towels, hygiene products, or pouring grease down drains creates blockages that prevent proper flow. Over time, this leads to sudden and messy backups.
  5. Sewer Line Breaks or Misalignment
    Shifting soil, construction activity, or poor installation can cause joints to separate, collapse, or misalign. This restricts sewage flow and increases the risk of backups.

Why Sewage Backups Are So Dangerous

  • Serious Health Hazards
    Category 3 water contains pathogens that can cause gastrointestinal illness, skin infections, and respiratory problems. Direct contact or even airborne exposure can be harmful.
  • Extensive Property Damage
    Sewage water saturates drywall, flooring, insulation, and furniture. Most porous materials must be removed, not just cleaned, to prevent long-term contamination.
  • Lingering Odors and Hidden Contamination
    Even after water is removed, dangerous bacteria can remain inside building materials, causing odors and long-term health risks if not properly treated.

Why Professional Cleanup Is Essential

Sewage losses are not a DIY job. Shop-vacs, mops, and household disinfectants cannot fully sanitize a contaminated area. Professional sewage cleanup includes:

  • Full Safety Precautions – Crews wear PPE including respirators, gloves, and protective suits.
  • Specialized Extraction – Industrial pumps and vacuums remove contaminated water quickly.
  • Controlled Demolition – Unsalvageable materials such as carpet, insulation, and drywall are safely removed.
  • Disinfection & Sanitization – EPA-approved disinfectants are applied to all affected surfaces.
  • Structural Drying – Dehumidifiers and air movers prevent mold growth after cleanup.

Protecting Your Property from Future Sewage Losses

While not all sewage losses are preventable, there are steps you can take to reduce risk:

  • Schedule routine inspections of older sewer lines.
  • Avoid planting trees near underground sewer pipes.
  • Install a backwater valve to prevent municipal backups during storms.
  • Never flush wipes, feminine products, or paper towels — even if labeled “flushable.”
  • Properly dispose of cooking grease instead of pouring it down drains.

Fast Response Matters

Every minute counts during a sewage loss. Delaying cleanup can mean higher repair costs, more property damage, and greater health risks.

At MSI, our trained teams are available 24/7 for emergency sewage cleanup and water damage restoration. We follow strict industry standards to remove hazardous water, sanitize the property, and restore it safely — giving you peace of mind when you need it most.

Call MSI today at 215-339-1769 for immediate sewage cleanup services.

When Rain Overwhelms Your Basement Windows: Why and How to Stop It

Basements are often the first place to flood during a heavy storm — and one of the biggest culprits is often overlooked: basement windows. When rain falls faster than the ground can absorb it, water looks for the path of least resistance — and weak or poorly sealed window wells become prime targets.

At MSI, we’ve responded to countless water damage calls caused by this exact issue. Here’s what every homeowner needs to know.


Why Basement Windows Leak During Heavy Rain

Basement windows are designed to keep out normal moisture and weather conditions — but when water pools outside the window well, problems begin. Here’s why it happens:

  • Poor Drainage in the Window Well
    Many window wells don’t have a functioning drain or gravel base to let water percolate downward. Once water builds up, pressure forces it through any crack or gap.
  • Clogged or Non-Existent Window Well Drains
    Leaves, dirt, and debris can block window well drains, essentially turning your window into a small fish tank — until it bursts.
  • Improper Window Sealing or Aging Caulk
    Over time, the seals around basement windows break down. Even the tiniest gap becomes a direct entry point when water is pushing with pressure behind it.
  • Grading and Landscaping Issues
    If the ground slopes toward the house, rainwater naturally flows toward your foundation and basement windows, compounding the problem.

The Water Damage That Follows

Once water finds its way through a basement window, it doesn’t take long for real damage to occur:

  • Soaked carpets and drywall
  • Warped wood framing and baseboards
  • Mold growth within 24–48 hours
  • Damage to stored contents or finished basements

By the time you notice a puddle, water has already been working its way into porous materials, and the damage has begun.


How to Prevent Water from Entering Through Basement Windows

The good news? With the right upgrades and maintenance, this type of water damage is completely preventable:

  • Install or Clear Out Window Well Drains
    If your window wells don’t drain, water will always pool. Make sure each well has a functional drain with gravel for proper flow.
  • Add Clear Window Well Covers
    These polycarbonate covers keep rain and debris out while still letting in light — a simple fix that prevents buildup.
  • Inspect and Reseal Window Frames
    Regularly check the caulking and seals around each window, especially before storm season.
  • Improve Grading Around the Home
    The soil should slope away from the foundation. If not, water runoff will move straight toward your window wells.
  • Consider Exterior Drainage Solutions
    French drains, downspout extensions, and sump pumps all play a role in redirecting water away from basement windows.

Conclusion

Water intrusion through basement windows may seem like a small problem, but it can lead to major damage and costly repairs. Heavy rain is going to happen — the real question is whether your home is prepared for it.

If your basement recently flooded, don’t wait. Mold can begin growing in as little as 24 hours. At MSI, we provide fast, thorough water damage restoration and mold prevention services to get your home back to normal — safely and correctly.

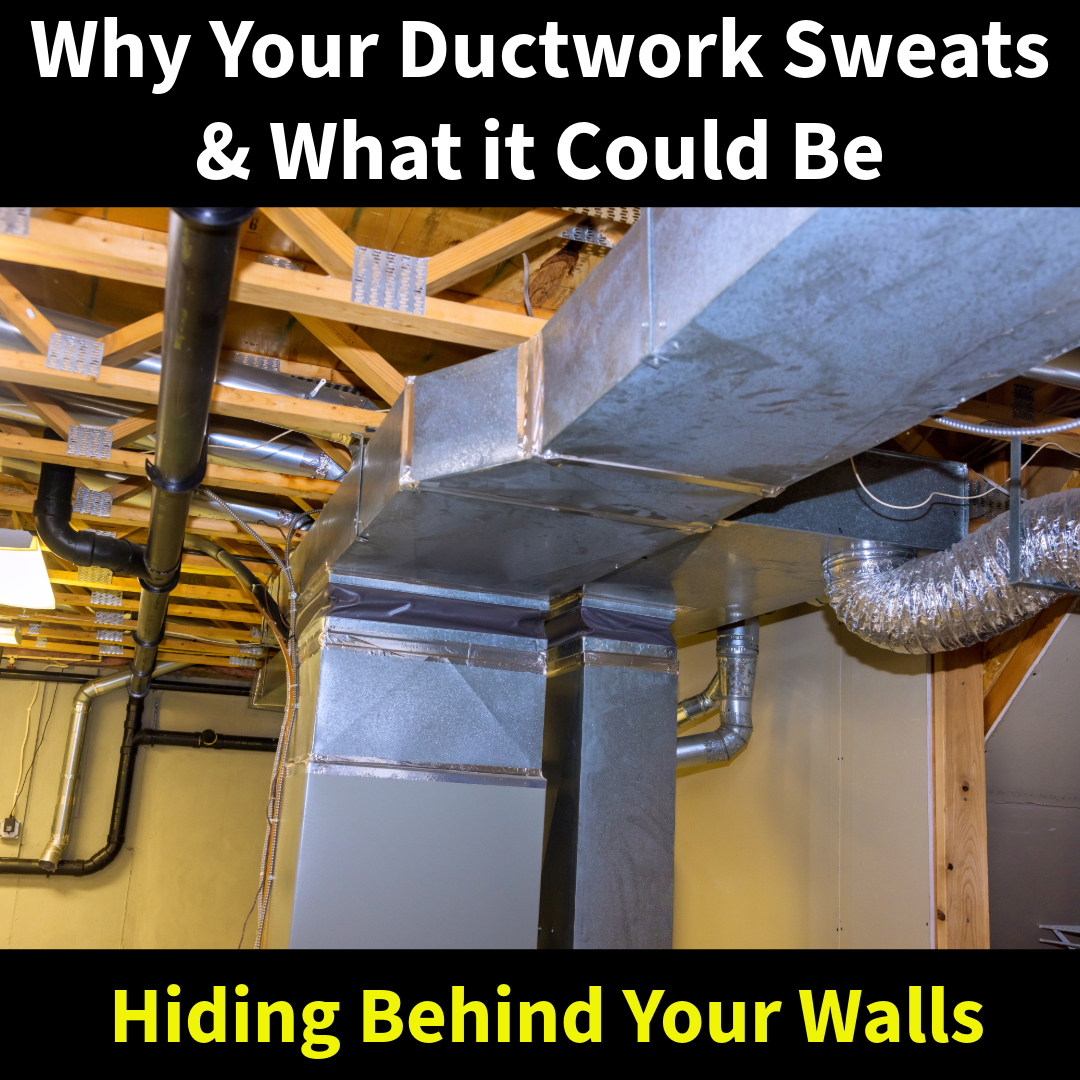
Why Your Ductwork Sweats & What It Could Be Hiding Behind Your Walls

When your HVAC system is running, you probably don’t think twice about the ductwork behind your ceilings or walls. But that same ductwork can become a hidden source of water damage, mold growth, and costly repairs—especially when condensation starts to build up. Understanding why ductwork condensates, where it’s most likely to happen, and what can go wrong as a result can save you thousands down the road.

Why Does Ductwork Condensate?

Condensation forms when warm, humid air comes into contact with a cold surface—just like a cold glass of water on a hot day. In your home, that cold surface is often the metal ductwork carrying cool air from your AC system.

Several factors can lead to ductwork sweating:

  • High indoor humidity: When indoor humidity climbs above 60%, there’s a greater risk of condensation.
  • Poor insulation around the ducts: If the ducts aren’t properly insulated, the cold air inside causes the metal to “sweat” in warm, humid conditions.
  • Air leaks: When warm air infiltrates ductwork through gaps, it can trigger internal condensation.
  • Unconditioned spaces: Ducts running through areas like attics, crawl spaces, or basements are particularly vulnerable due to temperature differences.

Where It Happens Most

Condensation can occur anywhere ductwork runs, but it’s most common in:

  • Basements and crawl spaces – These areas are naturally more humid and often not air-conditioned.
  • Unfinished attics – Especially if your home has metal trunk lines running across the attic floor.
  • Ceiling spaces – Ducts that run through unconditioned ceiling voids, particularly in older homes, are prime targets.
  • Wall cavities – When cool air is pushed through walls that aren’t insulated properly, trapped humidity can result in slow, hidden condensation buildup.

The Damage It Causes

While a little bit of sweating may not seem like a big deal, consistent or excessive condensation can cause:

  • Water stains on ceilings or walls
  • Rusting or corrosion of ductwork
  • Damage to drywall or insulation
  • Mold growth in walls, ceilings, or around vents
  • Compromised indoor air quality and allergy flare-ups

Over time, that dripping moisture creates an ideal environment for mold colonies to thrive—especially in hidden areas where homeowners may not notice the problem until odors or stains appear.

How to Fix and Prevent It

Addressing condensation issues requires a combination of proper HVAC maintenance, insulation, and moisture control:

  1. Improve duct insulation
    Wrapping your ducts with proper insulation (like closed-cell foam or fiberglass sleeves) reduces surface temperature differences and helps prevent sweating.
  2. Seal air leaks
    Use mastic sealant or foil-backed tape to seal duct joints and connections to keep warm air out and conditioned air in.
  3. Control humidity
    Use a whole-home dehumidifier or portable units to keep indoor humidity below 50%. Basements and crawl spaces especially benefit from dehumidification.
  4. Encapsulate crawl spaces
    Crawl space encapsulation with vapor barriers and dehumidifiers can dramatically reduce ambient moisture and prevent condensation on ductwork.
  5. Check HVAC system performance
    An undersized or oversized AC unit can lead to improper cycling and excess moisture in ducts. A licensed HVAC tech can help assess your system.
  6. Routine mold and moisture inspections
    If your home has a history of duct sweating, regular inspections can catch early signs of water damage or mold before they become a major problem.

The Mold Risk You Can’t See

If condensation has already caused water to drip behind ceilings or into wall cavities, you may already be dealing with mold growth without knowing it. Musty smells, allergy symptoms, or unexplained stains are all warning signs.

Even small water leaks from ductwork can fuel mold colonies that spread through walls, ceilings, or insulation—impacting both the structure of your home and your health.

When to Call in the Pros

At MSI, we’ve seen it all—from duct condensation slowly rotting out ceiling drywall to hidden mold colonies triggered by a single HVAC leak. Our team offers professional mold testing, moisture mapping, and full-service water damage restoration. We also work with homeowners and HVAC contractors to identify the root cause and prevent it from happening again.

Sweating ductwork might seem like a minor nuisance, but the long-term consequences are anything but small. If your vents drip, your ceilings stain, or you’ve noticed that musty smell coming back again and again, don’t ignore it. Moisture + time = mold. And mold doesn’t go away on its own.

Since 1998, MSI has helped thousands of homeowners throughout Pennsylvania, New Jersey, and Delaware detect and resolve hidden moisture and mold problems—safely and thoroughly. If you suspect your ductwork might be doing more than just cooling your air, give us a call.

When Water Damage Isn’t Handled Right: A Philadelphia Homeowner’s Story

When disaster strikes, homeowners are often overwhelmed—especially when it comes to navigating insurance claims and choosing the right restoration company. A recent case in Philadelphia highlights exactly why who you choose matters just as much as what happened.

The Incident: A Sprinkler Leak Gone Wrong

A homeowner in Philadelphia experienced a water loss when a sprinkler head on the third floor malfunctioned. Water poured down from the bedroom, into the second-floor kitchen and living area, and eventually made its way into the basement.

The homeowner did what most people do—she filed an insurance claim. The insurance company quickly recommended one of their preferred vendors, a national restoration franchise.

What Went Wrong

The franchise vendor responded by placing more than two dozen fans and four dehumidifiers throughout the house—but only removed a small section of drywall in the basement. Despite water clearly traveling through multiple floors, they didn’t open up the kitchen walls, bedroom areas, or inspect insulation behind walls. After five days of this “dry out,” they packed up their equipment and called it a job well done.

But the homeowner wasn’t convinced.

She was concerned about the lack of thoroughness, the potential for future mold, and the real condition of her home. That’s when she called MSI for a second opinion.

What We Found

Our team conducted a full moisture inspection and quickly discovered:

  • Wet drywall that hadn’t been removed
  • Insulation behind walls that was still saturated
  • Elevated humidity in multiple areas, indicating incomplete drying

We immediately began proper remediation:

  • Removed all wet drywall and insulation in affected areas
  • Properly dried the structure using calibrated equipment
  • Conducted post-dryout moisture testing to verify the home was safe and sound

The Bigger Picture: Why This Happens

This story is far too common—and it reveals some uncomfortable truths about the restoration industry:

  1. You can choose any restoration company you trust. You’re not required to use the vendor your insurance company recommends.
  2. Franchise vendors often work in the insurance company’s interest. They may maximize fan rental time for profit while avoiding necessary demolition, because less demolition means lower reconstruction costs for the insurer.
  3. They rarely prioritize long-term health. Without proper removal, trapped moisture behind walls leads to mold—but mold remediation down the line is your problem, not theirs.

Final Thoughts

This Philadelphia homeowner avoided a serious mold issue by trusting her gut and seeking a second opinion. Unfortunately, many others aren’t so lucky. When dealing with water damage, thoroughness matters. A rushed or partial job can lead to thousands in future repairs, mold remediation, and health concerns.

At MSI, we don’t cut corners. Since 1998, we’ve helped homeowners across Pennsylvania, New Jersey, and Delaware restore their properties the right way—from emergency water damage response to full structural drying and mold prevention.

Mold Riders & Water Damage: What You Need to Know

Water damage is one of the leading causes of costly home repairs—and often, it doesn’t end when the water is gone. Mold can begin to grow within just 24 to 48 hours of a water event. If you’re not properly covered, this can lead to thousands in out-of-pocket expenses.

What Is a Mold Rider?

A mold rider is an optional endorsement you can add to your homeowners insurance policy. It’s designed to provide limited mold coverage, typically for mold that results from a covered water loss, like a burst pipe or accidental overflow.

But here’s where things get tricky…

Mold Coverage Only Applies if the Water Loss Is Covered

Even if you have a mold rider, your insurance only helps if the source of water damage is something your policy covers. That means:

Covered: A dishwasher hose bursts, flooding your kitchen. You act quickly, but mold forms behind the cabinets. Your mold rider may apply.

🚫 Not Covered: Mold develops over time from poor ventilation, high humidity, or a slow roof leak that’s been ongoing. These are usually considered maintenance issues—and not covered.

Mold Riders Have Coverage Limits

Another important point: even if you’re covered, most mold riders come with caps. The most common limits are:

  • 💵 $2,500 to $5,000 in mold coverage
  • 💵 Some policies may offer up to $10,000, but that’s rare and usually comes at a higher premium

These limits apply to everything—remediation, reconstruction, and sometimes even content replacement. That doesn’t go far if you have mold in walls, ceilings, HVAC systems, or personal belongings.

Why Mold Coverage Matters

Mold isn’t just a nuisance—it’s a potential health hazard. Prolonged exposure can lead to:

  • Respiratory irritation
  • Headaches and fatigue
  • Skin rashes
  • Worsened symptoms for asthma and allergy sufferers

The faster you act after water damage, the lower the chance of mold spreading—and the less you’ll have to fight with insurance to get it covered.

What Should Homeowners Do?

Review Your Policy – Look for any mold exclusions or limits
Know Your Coverage Limits – Don’t assume you’re protected for the full cost
Add a Mold Rider if You Don’t Have One – It’s relatively inexpensive and worth the protection
Call MSI Immediately After Water Damage – We respond fast, dry out properly, and document every step to protect your claim
Don’t Delay Remediation – Mold caused by slow response time may be denied under your policy


Trusted by Homeowners Since 1998

At MSI, we’ve helped thousands of homeowners across Pennsylvania, New Jersey, and Delaware handle water damage and mold issues the right way—from emergency dry-outs to comprehensive mold remediation.

We work with all major insurance companies, provide proper documentation, and never cut corners—because your health and your home deserve better.


When water strikes, mold is just around the corner.
Call MSI right away to stay ahead of the damage—and the insurance headaches.